Products
Solutions
Resources
9977 N 90th Street, Suite 250 Scottsdale, AZ 85258 | 1-800-637-7496
© 2024 InEight, Inc. All Rights Reserved | Privacy Statement | Terms of Service | Cookie Policy | Do not sell/share my information

When a project has been created in Platform and flagged as being Time and Materials, it is automatically synced into Billings.
To configure the project for billings purposes, double-click the existing project from the list and go through the tabs listed below.
You can also manually create a new project by clicking the Add Row icon on the ribbon bar.
A project created manually in Billings will not be automatically created in Platform.
To select bill rates, click the Bill Rate Table drop-down list, and then select the rate table that contains the bill rates that apply to the project.
/Billings Setup_120.png)
/Billings Setup_121.png)
Select the applicable job Cost Rate Table from the drop-down menu, if desired, and finally select the applicable Payroll Rate Table from the drop-down menu, again, if desired or required.
/Billings Setup_122.png)
/Billings Setup_123.png)
If timesheet approvals are required for the project, check the Approval required check box. The main result of this check box being set is that unapproved time sheets are not picked up for the LEM or Invoicing process, or other exports which have time sheet approvals enabled.
Work flow can also be handled at the processing stage of the time sheet cycle. If you are generating a LEM process, the process can be set to the ignore approval work flow, depending on your organizational work flow requirements.
Select the level of detail you want the budgeting information to use if you wish to track project budgets in Billings. Most projects require more than one level of detail in the project structure. You can track budgets and progress at the Project/ WBS level or at the WBS/Cost Code level, depending on your budgeting requirements.
Project Level 1 means the budget is being created at the root project level. If set to Project Level 2, the budget is being applied to WBS Level 1, second node of the project tree.
/Billings Setup_124.png)
In the Default Markup Values section, enter markup percentage values for your charge out rates for Line Items that are entered on time sheets.
/Billings Setup_125.png)
/Billings Setup_126.png)
Select the Invoice markups as separate invoice items if you want the markups to show on their own invoice line, otherwise invoices will show fully marked-up amounts.
In the Exceptions section, enter any markup exceptions that apply to specific line-item types. These values are entered as percentages.
/Billings Setup_127.png)
Click Add Row on the ribbon menu to add new cost codes to the project/WBS node selected. Billings only allows charging of time and resources to a project node if cost codes have been associated with the project or WBS node. If your project structure is complex, you would normally not attach any cost codes at the root node, as they would be defined at the lowest level of the project/WBS tree structure.
/Billings Setup_128.png)
If you need to remove a cost code, select the line, then click Delete Row(s) from the ribbon menu.
Add as many cost codes to the node as needed to capture the required information during LEM data entry. If the Project/Cost Code custom fields have been set up, you can populate them by clicking on the small filter icon next to the cost code to open a list of the custom fields available.
This tab lets you enter project specific data into custom fields that have been set up by the administrator, along with general project notes.
/Billings Setup_129.png)
Select the equipment filtering option that you want to apply to the project.
• No Filter lets you to select any active piece of equipment, given the Region security filters.
• Filter by Site lets you to select only those pieces of equipment which have been associated with the site to which the project belongs to.
• Filter by Schedule lets you to select only those pieces of equipment for which the work date falls between the Start and End dates on the schedule page.
/Billings Setup_131.png)
When Filter by Schedule is selected, you can click Add Row to add equipment that is used in this project .
/Billings Setup_132.png)
Enter the assignment start and end dates as well as unit of measure and quantity to use in calculating the daily equipment cost.
The rate used in this calculation will be extracted from the Cost Rate Table set up for this project on the Configure tab.
Select the personnel/crew filtering option that you want to apply to the project.
• No Filter lets you to select any active person from the personnel list, given the Region security filter.
• Filter by Site Personnel List lets you to select only those individuals who have been associated with the site to which this project belongs.
• Filter by Selected Crews lets you to select only those individuals who belong to the crews selected in the rows below from the crews defined for the site this project belongs to.
/Billings Setup_133.png)
If Filter by Selected Crews is selected, select which crews will be working on this project by selecting the Add Row icon located on the ribbon menu.
Crews are defined at the Site level, which is identified in the General tab of the Project.
Select the material filtering option that you want to apply to the project.
• No Filter lets you to select any active material from the material list, given the Region security filter.
• Filter by Site lets you to select only those materials who have been associated with the site to which this project belongs to.
• Filter by Materials lets you to select only those materials that belong to the materials selected in the window below.
/Billings Setup_134.png)
In the Multi Day time sheet, section set the number of days that will appear by default on a Multi Day time sheet.
/Billings Setup_135.png)
The time sheet Numbering section lets you set up the prefix or suffix for the name you want to use in the naming of your time sheets. It also lets you set the starting number and number of digits you want to use. If you want to allow users to override the time sheet number, check the Allow user to override T/S number option.
You can add work orders that will be available on the time sheet page. To add a new work order, from the Work Order tab, select the Add Row icon located on the ribbon menu. When the new row appears on the page, provide all applicable information, then click Apply.
/Billings Setup_136.png)
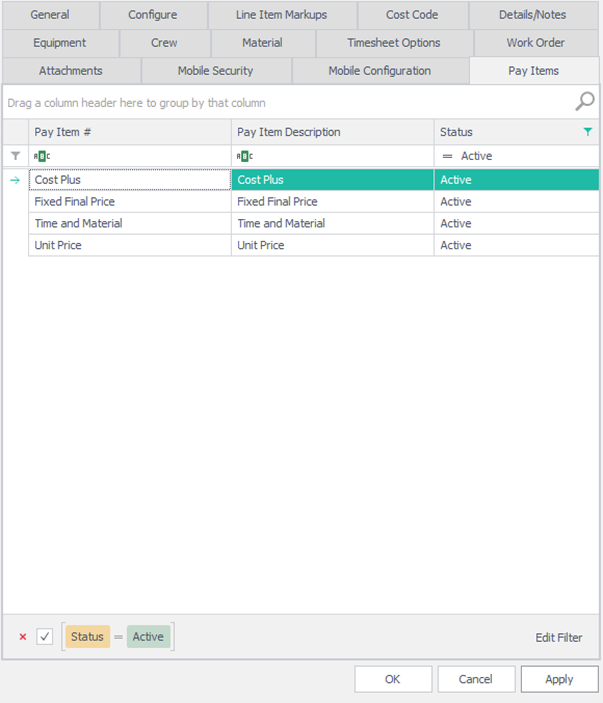
Pay Items will be automatically populated from Platform if they have been defined. However, you can also manually add pay items that can then be used on individual WBS items to group them for billing purposes. To add a new pay item, from the Pay Items tab, select the Add Row icon located on the ribbon menu. When the new row appears on the page, provide all applicable information, then click Apply.
You can upload any pertinent documentation for this project on the attachments tab.
1. To add an attachment, click the Add Row icon located on the ribbon bar.
2. To delete an unwanted attachment, select the row to be deleted by clicking it once and then click the Delete Row(s) icon located on the ribbon bar
3. After the new row appears, click the Folder icon in the new row in the Attachment column, to select the document you want to upload.

4. Locate the document in your folder structure, and then select it.
The attachment name shows in Attachment.
5. Select the type, file date and status from the columns, and then click Apply or OK.
After all the project tabs have been populated with the required information, you can create the WBS structure.
1. To add a WBS item to a project, right-click the project, and then select Add WBS.
Alternatively, you can click the Add button, located directly above the project name to add a new WBS item.

2. Enter the name of the new WBS and the Code or abbreviation to be used for this item and the PO number if required.
3. All other fields under the general tab are optional unless instructed otherwise by the administrator or required for the job. If left empty, these fields inherit values from the parent node, or the parent’s parent node.
Unless a different set of rates needs to be used on this node than those set up at the project node, nothing needs to be set up under the Configure tab. Rate table assignment also follows the inheritance rules as above.
4. To capture data on a time sheet against the project, cost codes must be applied to the project, either at the project node (not recommended), or at the WBS nodes.
5. To apply cost codes, click the Cost Code tab of the applicable project or WBS node .
/Billings Setup_137.png)
6. Click the Add Row icon located in the ribbon bar, then select the drop-down menu to choose the cost code.
The Budget and Progress tabs are only visible if you specified budgeting configuration information at the root node of the project in the Configure tab.
/Billings Setup_138.png)
/Billings Setup_139.png)
7. In the Budget and Progress tabs, you can retrieve information on the selected job to view.
8. Click Apply to complete the setup of the node.
9. Continue to create additional WBS items and any child WBS items that are further required following the steps above.
10. Using the Configure tab of a WBS item, select the applicable pay item that this WBS item belongs to (this might be pre-populated from InEight Control if pay items are maintained there)
10. After all folder levels have completed, click OK to save the project and exit the page.
11. After all folder levels have been completed, click OK to save the project and exit the page.
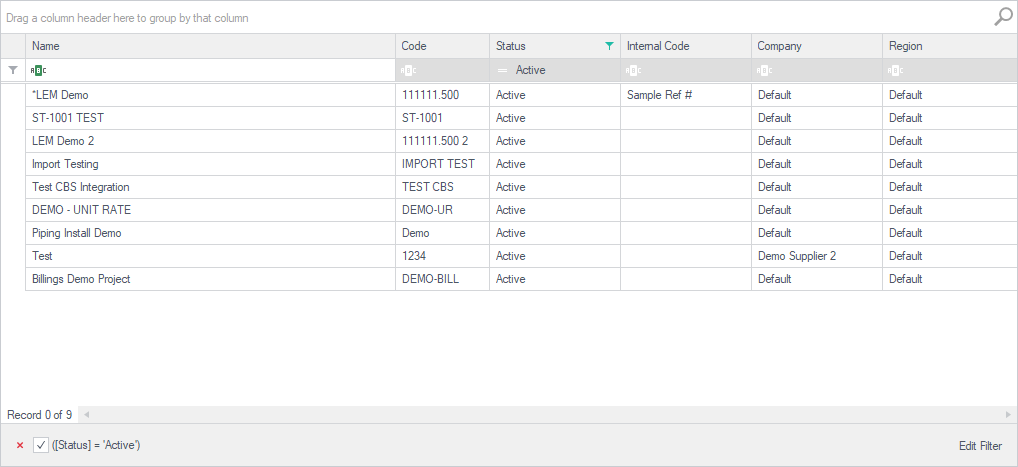
To view the list of projects that have been set up, click on File, Open and Project.
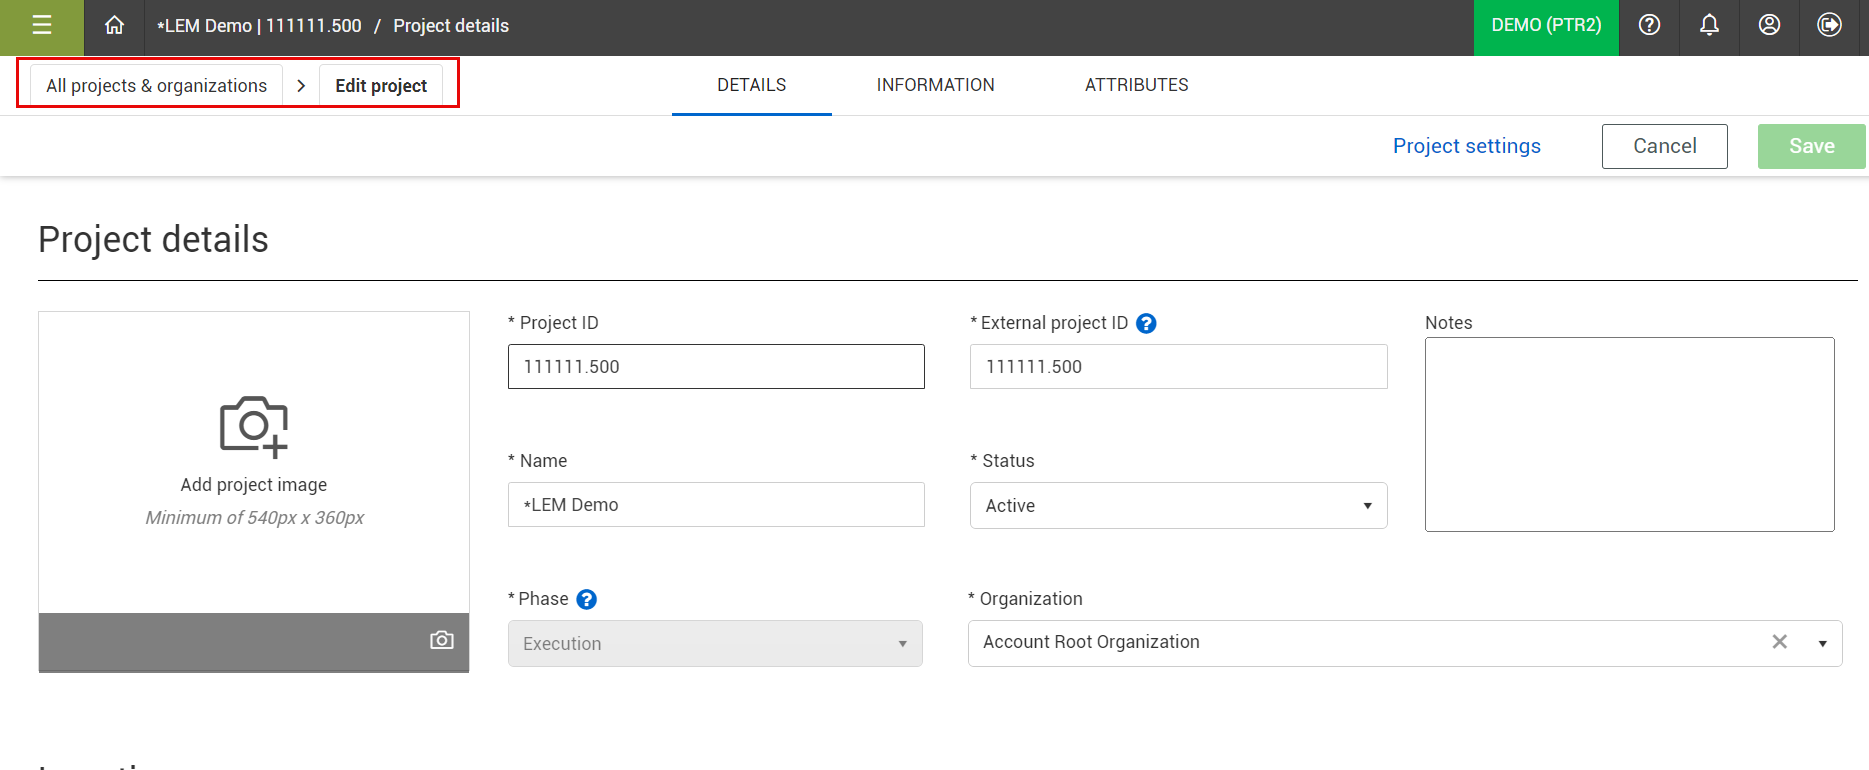
You can associate Billings with additional master data, such as project data from the Project details page in Platform. Associating Platform projects lets you organize Billings directly from Platform’s Organizational Breakdown Structure (OBS). Your location assignment in the OBS determines the access you inherit and your visibility to other OBS areas.
Extracting Platform project master data directly into Billings promotes data consistency and helps ensure that the data is being pulled from a single source of truth.
Platform project-specific master data can be maintained in one place, then it can flow directly into Billings in the cloud.
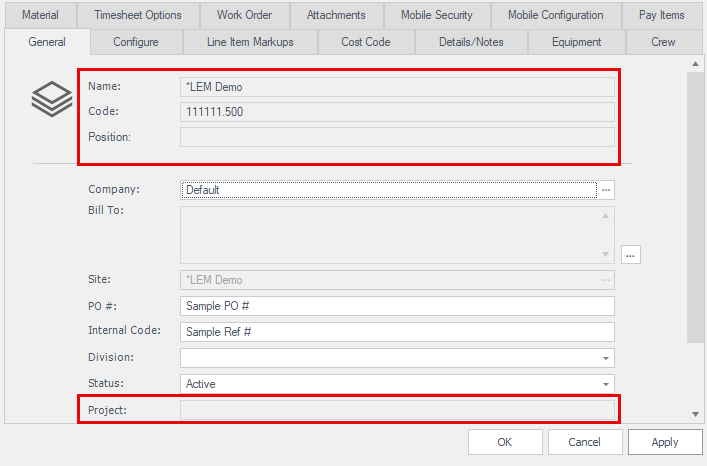
If the Billings project was created in Platform, the Project name, Code, and Position fields are disabled and can only be managed in Platform.
Additional Information
9977 N 90th Street, Suite 250 Scottsdale, AZ 85258 | 1-800-637-7496
© 2024 InEight, Inc. All Rights Reserved | Privacy Statement | Terms of Service | Cookie Policy | Do not sell/share my information